Dindigul Thalappakatti Biryani Recipe (Authentic Seeraga Samba Chicken Biryani)
Looking for an authentic Dindigul Thalappakatti biryani recipe at home? This Tamil Nadu style biryani is made using seeraga samba rice, which gives a unique aroma and traditional taste. In this recipe, I’ll show you how to make Thalappakatti chicken biryani step by step using simple ingredients and the dum cooking method to get perfect, flavorful biryani every time.
I recently visited Dindigul for a friend’s marriage, and that’s where I got the chance to try this biryani. I really liked it. One best thing about this seeraga samba biryani is you don’t need any store-bought masala. All the flavor comes from simple ingredients that we already have at home.
This biryani stands out because of its taste, and that taste mainly comes from the fresh masala we grind at home. I got this recipe from my friend and tried it in my kitchen. First time I tried, it turned out sticky. Then I adjusted the proportions and followed some tips from my friend — after that it came out really well.
I’ll share those tips at the end. Now let me show you how I made this step by step.
If you’re planning a full meal, you can also try this easy banana halwa recipe made with jaggery for a perfect sweet finish.
If you enjoy biryani recipes, you may also like this Easy 30-Minute Chicken White Biryani with Coconut Milk, a quick one-pot version that’s perfect for busy days.
What is Dindigul Thalappakatti Biryani
Thalappakatti biryani is a famous biryani from Dindigul, Tamil Nadu. It is known for its unique taste, simple ingredients, and traditional cooking method. Unlike other biryanis, this seeraga samba biryani uses small-grain rice that absorbs flavors really well and gives a rich aroma. The taste is slightly spicy, flavorful, and very different from regular basmati biryani.
If you enjoy Tamil Nadu style biryanis, you can also try this Ambur chicken dum biryani recipe, which has a different flavor profile but is equally delicious.
Why Seeraga Samba Rice is Used
Seeraga samba rice is the key ingredient in authentic Thalappakatti biryani. The grains are small but they absorb masala very well, which makes the biryani more flavorful. Compared to basmati rice, seeraga samba gives a traditional Tamil-style texture and taste. That’s why this seeraga samba biryani is more aromatic and not dry or bland.
Dum Cooking Method
Dum cooking is a slow cooking method where the biryani is cooked on low flame after mixing rice and masala. This helps all the flavors blend properly and gives the biryani its authentic taste. In this Thalappakatti chicken biryani recipe, dum cooking plays an important role in getting the perfect texture and flavor.
Thalappakatti Biryani Masala Powder (Fresh Spice Blend)
One of the key elements that gives this authentic Dindigul style biryani ,its unique aroma is the freshly ground masala powder. Unlike many biryani recipes that use ready-made spice powders, this traditional seeraga samba biryani uses whole spices that are freshly ground at home.
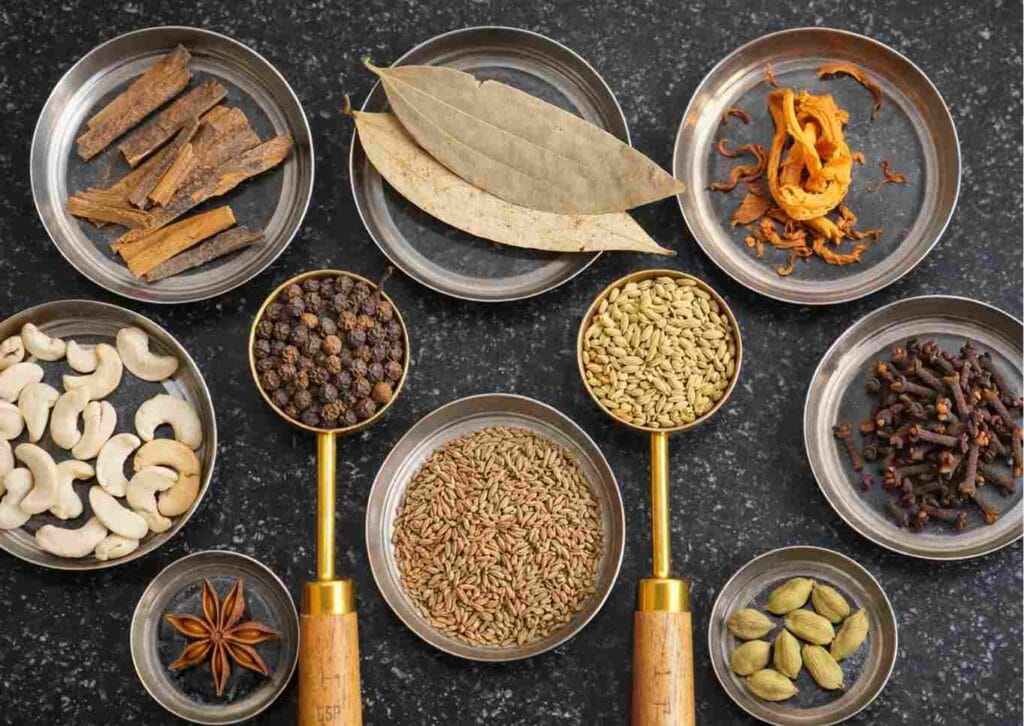
Coriander seeds, fennel seeds, pepper, cloves, cinnamon, cardamom, star anise, and a small piece of mace are ground together to create a slightly coarse masala powder. This spice blend gives a bold, peppery flavor that makes Thalappakatti biryani stand out from other biryanis.
Freshly grinding the spices helps release natural oils, which is what gives this biryani its authentic taste and rich aroma.
How to Make Thalappakatti Dum Biryani Recipe at Home ?
Follow this step-by-step Thalappakatti dum biryani recipe at home to prepare the authentic Dindigul-style chicken biryani using fresh ground masala, seeraga samba rice, and the traditional dum cooking method.
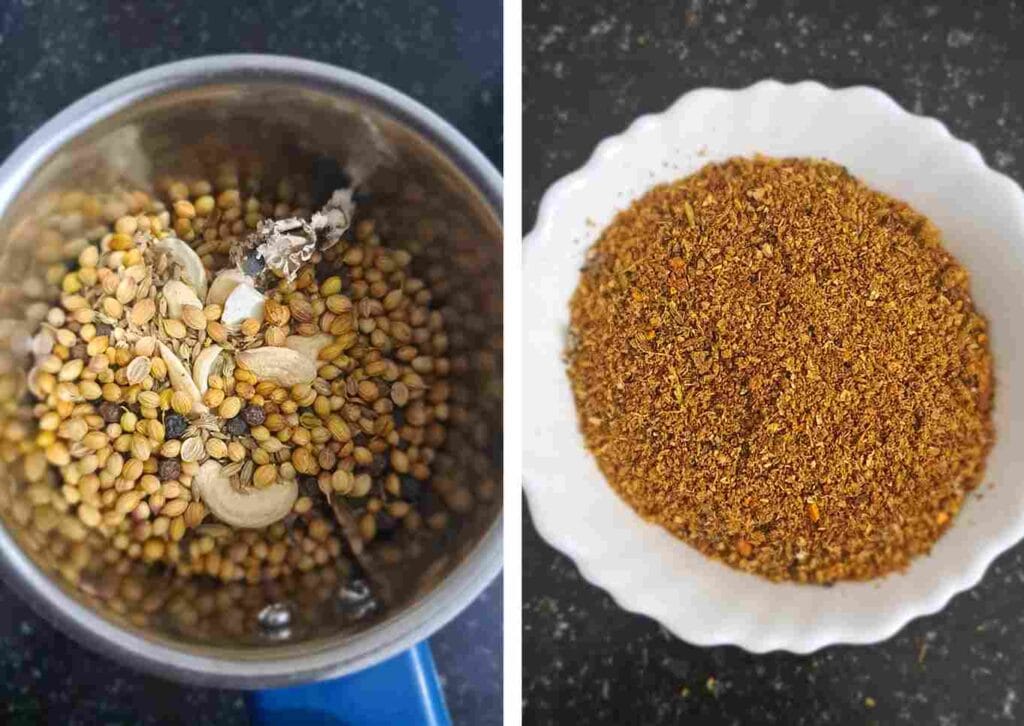
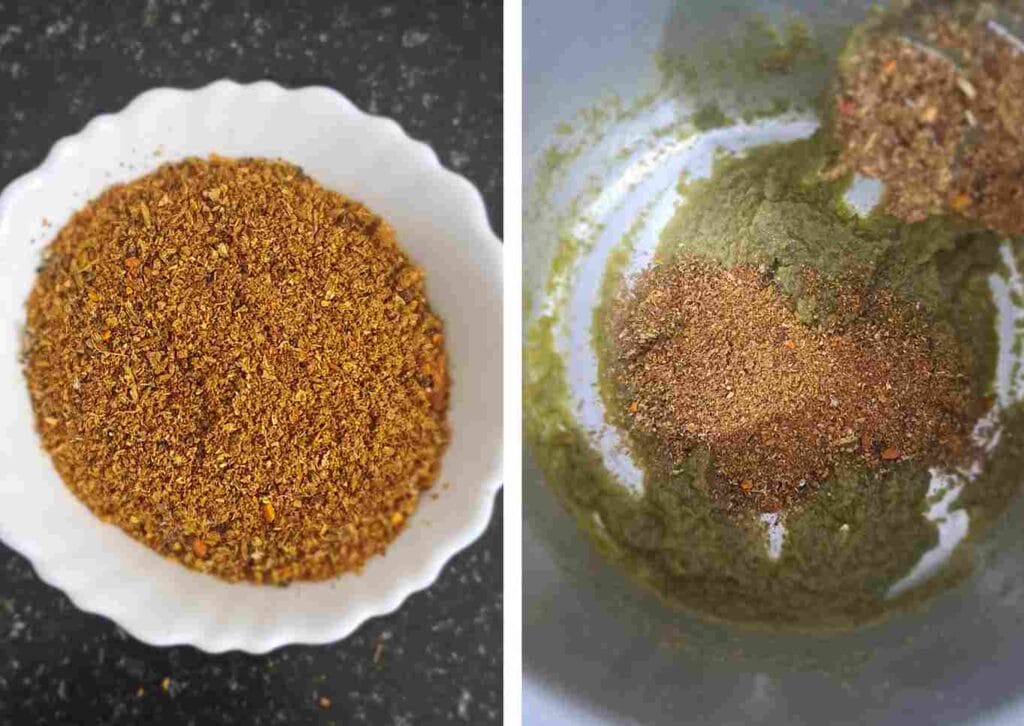
Step 1: Prepare the Fresh Biryani Masala Powder
Grind coriander seeds, fennel seeds, pepper, cloves, cinnamon, cardamom, star anise, and a few cashews into a slightly coarse powder to create the aromatic masala base for the Thalappakatti biryani.
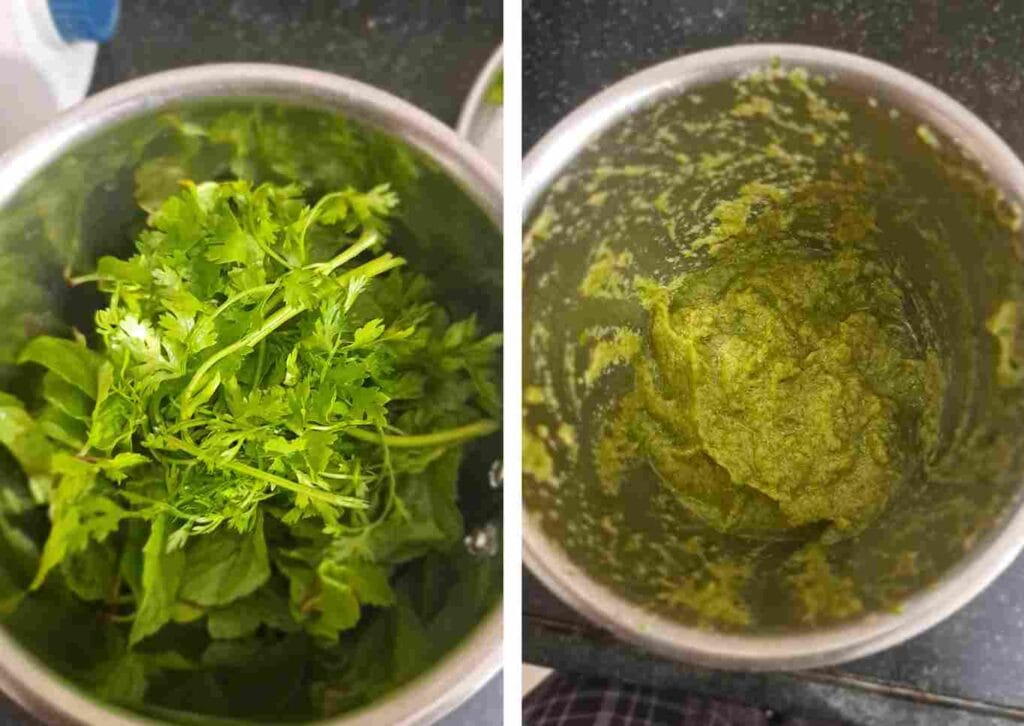
Step 2: Grind the Fresh Herb and Onion Paste
Grind onions, garlic, ginger, green chillies, mint, and coriander leaves into a thick paste to create the flavourful base for the biryani.
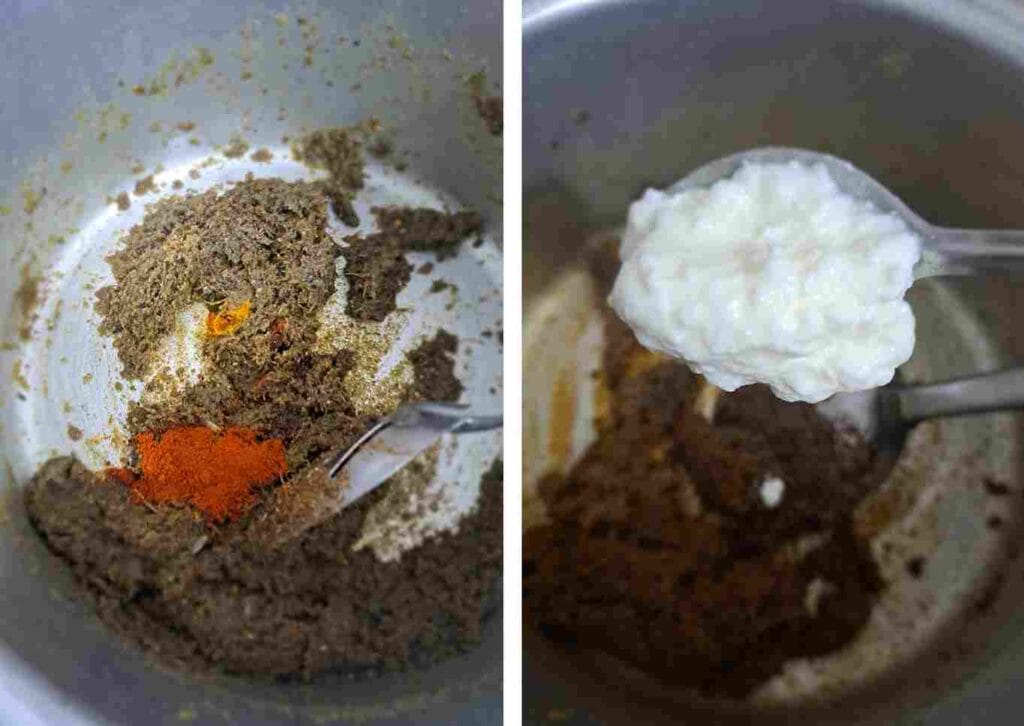
Step 3: Saute the Onion Paste in Ghee
Heat oil and ghee in a heavy-bottom pot, add the ground onion paste , and saute for 5 – 8minutes until the raw smell disappears.
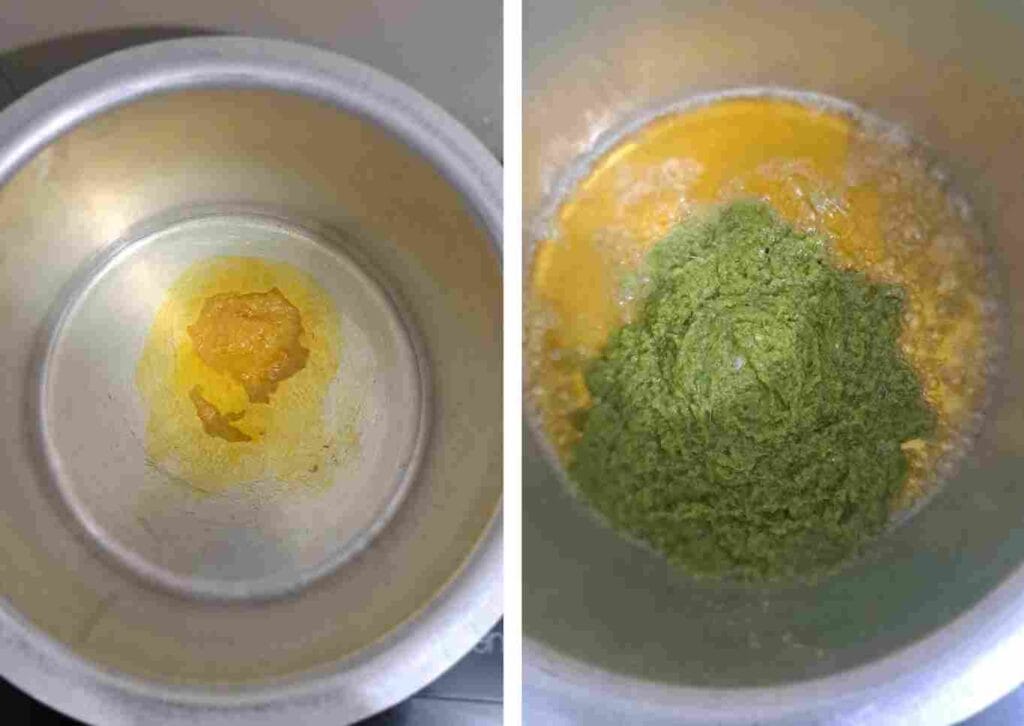
Step 4: Add the Freshly Ground Biryani Masala
Add the ground masala paste mix it and saute it well for 3mins
Step 5: Add Turmeric, Red Chilli Powder and Curd
Add turmeric powder, red chilli powder and curd to the masala mixture and sauté well until the spices blend and release a rich aroma.
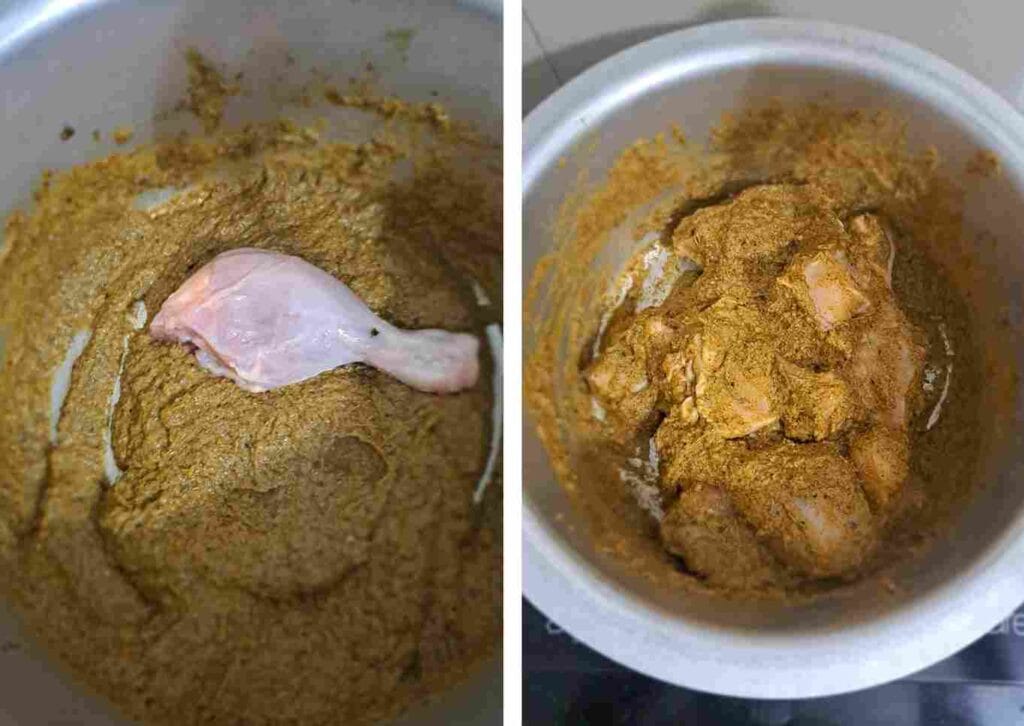
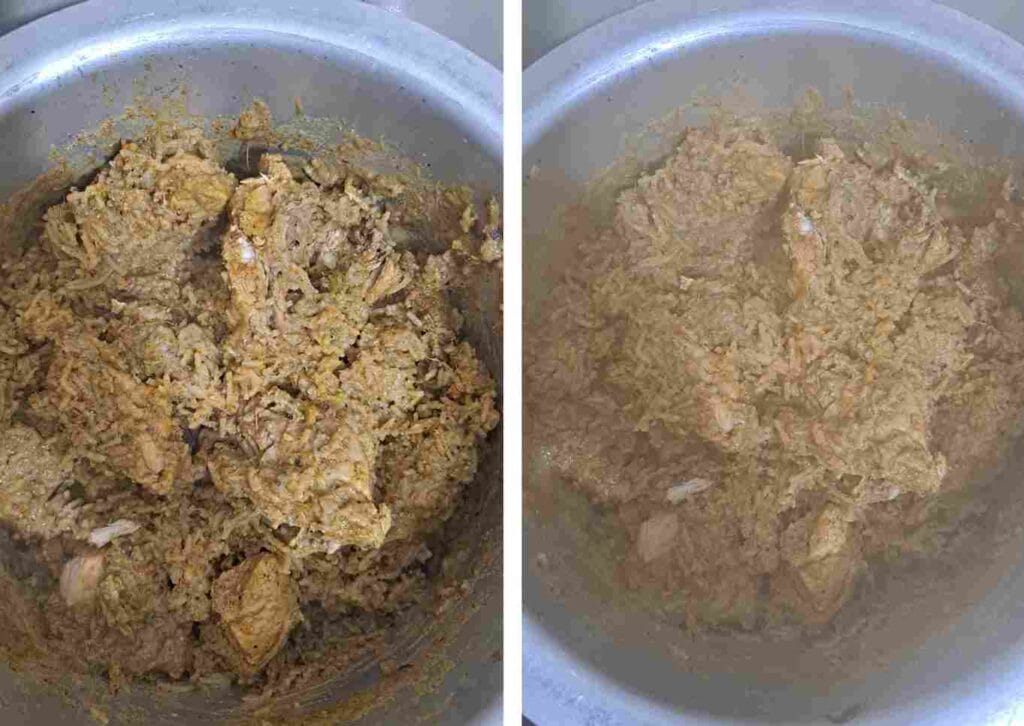
Step 6: Add the Chicken and Mix with Masala
Add the chicken pieces to the masala and mix well so the spices coat the chicken evenly before cooking.
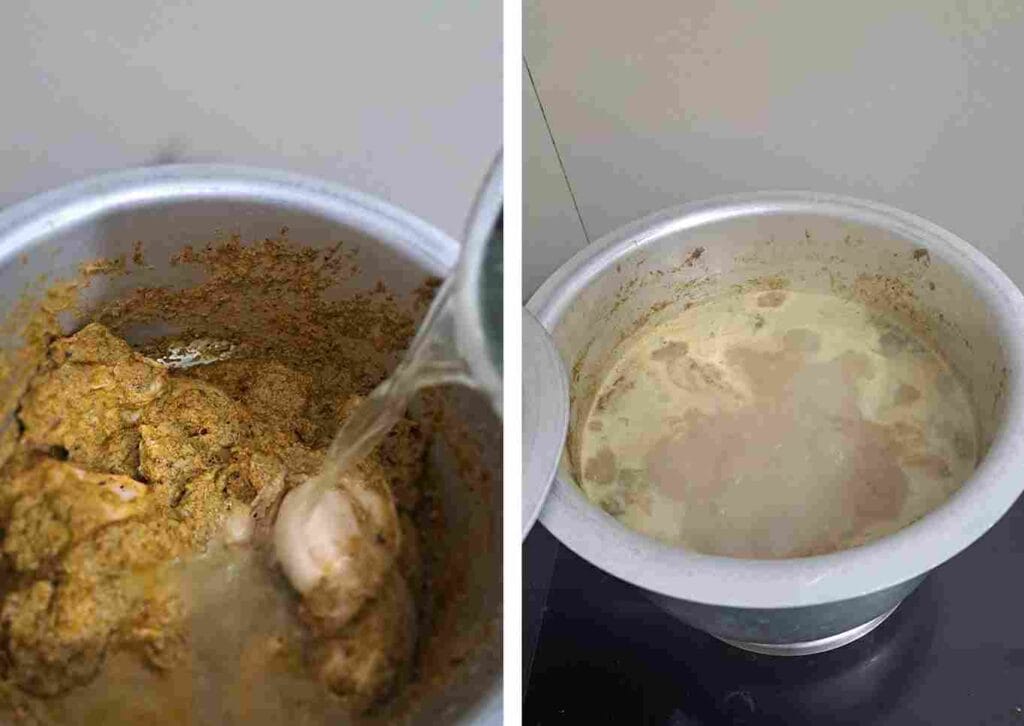
Step 7: Add Water and Cook the Chicken
Add water to the masala and chicken mixture and allow it to simmer so the spices blend well and the chicken cooks evenly.
Note : Usually, for biryani, we add 1 cup rice to 1.5 cups water. But here, chicken already releases water and we are also adding curd, so there will be extra moisture. So I reduced it and used only 1 cup of water, and it came out non-sticky and perfect.
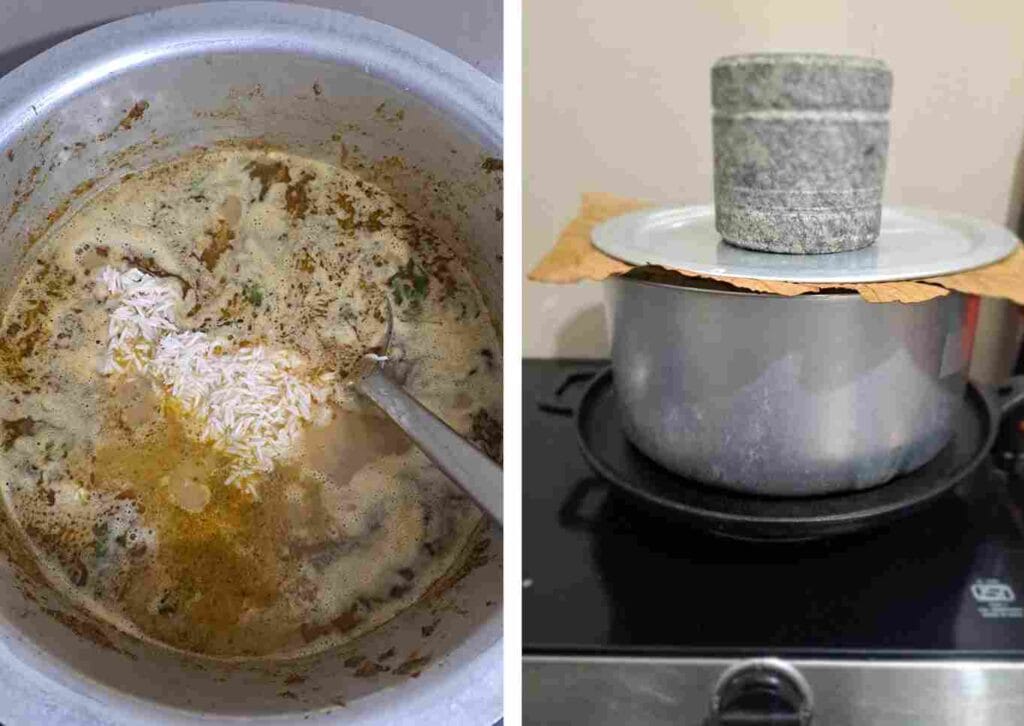
Step 8: Add Rice and Cook the Biryani on Dum
- Add the soaked seeraga samba rice and allow it to cook until the rice begins to partially cook and rise in the gravy.
- Cover the pot with a lid, place a heavy weight on top, and keep it on a tawa to cook on very low flame.
- Then switch off the flame and let the biryani rest in dum for another 15–20 minutes without opening the lid. This resting time helps the rice absorb all the flavors and gives a perfect non-sticky texture.
Note : Avoid opening the lid immediately, as the steam inside is important for proper dum cooking.
Step 9: Thalappakatti Biryani Cooked and Ready
After 20 minutes of dum cooking, switch off the stove, rest the biryani for 10 minutes, then gently fluff and serve.
During festivals in Tamil Nadu, biryani is often served along with sweet dishes like this Sakkarai Pongal recipe, or Rava Kesari Recipe a classic South Indian dessert made with rice and jaggery.
For detailed ingredient measurements, cooking time, and the complete cooking method, refer to the recipe card below.

Thalappakatti Dum Biryani Recipe at Home
Ingredients
Equipment
Method
- Heat oil and ghee in a heavy-bottom pot and add the ground onion paste. Saute until the raw smell disappears.
- Add the prepared ground masala paste and saute it for 3mins . Then add turmeric powder and red chilli powder. Cook well until the oil begins to separate.
- Add curd and mix well to form a rich masala base.
- Add chicken pieces and sauté for 2–3 minutes so the chicken absorbs the flavors.
- Pour 1½ cups water, add required salt and close the lid, and cook the chicken for about 10 minutes.
- Add soaked seeraga samba rice and cook until the rice is partially done. Add a squeeze of lemon juice at the end for extra flavor.
- Cover the pot with a lid, place a weight on top, and cook on low flame using the dum method for about 20 minutes.
- Turn off the stove and allow the biryani to rest for 10 minutes before opening the lid.
- Gently fluff the rice and serve hot.
Notes
- Always use seeraga samba rice for authentic Dindigul Thalappakatti biryani flavor.
- Cook the final stage on very low flame to avoid burning the rice during dum cooking.
- Let the biryani rest for 10 minutes before opening the lid so the rice absorbs the flavors.
- Chicken releases natural water while cooking, so adjust the amount of water accordingly to maintain the correct rice consistency.
Tips & Variations
- Use seeraga samba rice for authentic Dindigul Thalappakatti flavor. This short-grain rice absorbs the masala better than basmati rice.
- Freshly ground masala makes a big difference. Grinding the spices fresh gives the biryani its signature aroma and taste.
- Cook on very low flame during dum. This helps the rice absorb all the flavors without burning at the bottom.
- Add a squeeze of lemon juice at the end for a slightly tangy flavor that enhances the biryani.
- For extra richness, you can drizzle a little ghee on top before starting the dum cooking stage.
- Serve with simple sides like onion raita, boiled egg, or brinjal gravy for a complete meal.
FAQs About Thalappakatti Dum Biryani
What makes Thalappakatti biryani different from other biryanis?
Thalappakatti biryani is unique because it uses seeraga samba rice, freshly ground masala, and dum cooking which gives it a strong aroma and rich flavor.
How long should Thalappakatti biryani cook in dum?
The biryani is usually dum cooked on very low flame for about 15–20 minutes so the rice absorbs the masala and chicken flavors.
Can I make Thalappakatti biryani without seeraga samba rice?
Seeraga samba rice gives the authentic taste, but if it is not available you can use short-grain rice or basmati rice, though the flavor will be slightly different.
How do you do dum cooking without an oven?
Traditional dum cooking is done by covering the pot with a lid, placing a heavy weight on top, and cooking on very low flame or on a tawa to trap the steam.
What rice is used for Dindigul Thalappakatti biryani?
Authentic Dindigul Thalappakatti biryani is made using seeraga samba rice, a short-grain aromatic rice that absorbs masala flavors better than basmati rice.
What spices are used in Thalappakatti biryani masala?
Thalappakatti biryani masala usually includes cinnamon, cloves, fennel seeds, black pepper, star anise, mace, coriander seeds, ginger, garlic, mint, and coriander leaves. These freshly ground spices give the biryani its strong aroma and authentic Dindigul flavor.
Why You Should Try This Thalappakatti Chicken Biryani Recipe
This Dindigul style Thalappakatti biryani is a flavorful recipe prepared with freshly ground masala and the rich aroma of seeraga samba rice. The dum cooking method helps the rice absorb all the spices and chicken juices, giving you a well-balanced and authentic Tamil Nadu taste.
If you’ve been trying to make a perfect seeraga samba chicken biryani at home in Dindigul style, this method is simple and really works. Especially if you’ve faced issues like sticky biryani, just follow the water ratio and tips I shared — it makes a big difference.
This is one of those recipes that gets better every time you try it.
If you make this Thalappakatti chicken biryani at home, let me know how it turned out. Did it come out non-sticky? I’d love to hear your experience.